Photos. I take a LOT of photos. I almost hate to admit how much of my hard drive is taken up by my photo library. Some may say… Forget that. I have been told by service that my photo library is larger than most of photo libraries on computers they have services.
Yes, it is large, but I have so many photos for memories. Memories of my kids when they were little. Memories of trips we have taken together as a family. Memories that I will be able to pass on to my children.
While I have a lot of photos, not all of them are of the best quality. Some that I took with cheaper cameras aren’t so crisp. Some I took with shaky hands while rushing to catch the moment before before it passed. The lighting in some photos is not what it should have been. Yes, I have a DSLR, and I haven’t learned all the ins and outs of the manual setting.

Like this one. The kids like to watch Disney On Ice shows, and I try to take photos of scenes I think they will like. Like Wendy above. However, it’s hard to keep up with the skaters, and sometimes that causes the lighting to be off or the photo to be slightly out of focus.
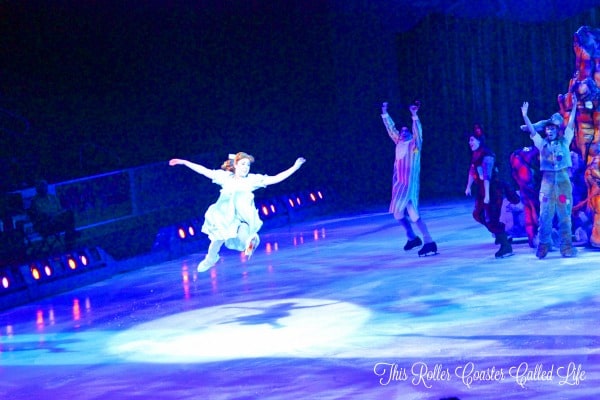
Years ago, I purchased Adobe Photoshop Elements. I do mean YEARS ago, and I could never quite figure it out. Recently, I was given Adobe Photoshop Elements 14 and Premiere Elements 14 to try out. I’m here to tell you that things are a lot different than the copy I had YEARS ago! While there is going to be a learning curve, it appears to be a lot easier than before. I used some of the quick features to sharpen Wendy up a little in the photo above.

A couple of weeks ago, we went to Hershey Gardens to look around. We hadn’t been there before and were looking forward to seeing all the flowers there. I took a lot of photos of flowers, but this photo of my kids walking together is one of my favorite of the day. The problem is that when I realized I wanted to get this shot, I had to rush to get my camera on, lens cap off, and fire off a shot. The one photo I got is a little blurry.
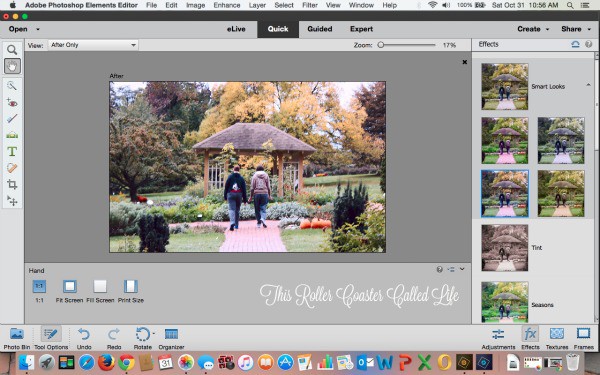
I decided to try to run this photo through Adobe Photoshop Elements (PSE) 14 to see if I could make it look a little better. Please keep in mind that this was my first time trying PSE 14 out, so I’m sure I can do better with more practice.
In the above photo, you can see there are three different sections for editing: Quick, Guided, and Expert. I did start with Quick. Can you see the photo thumbnails on the right? I am in the “Effects” section, and each type of effect gives a little preview.
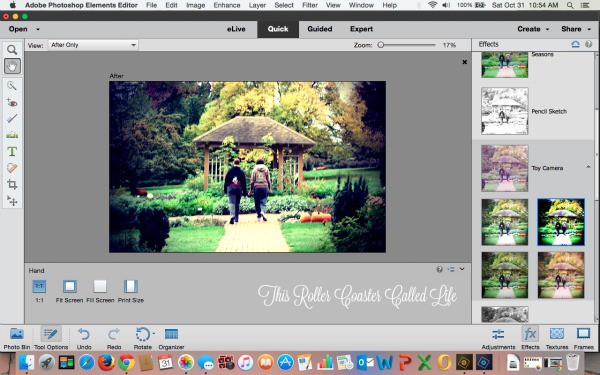
I tried out several options and quickly settled on the “Toy Camera” effect. I think this really enhanced the photo.
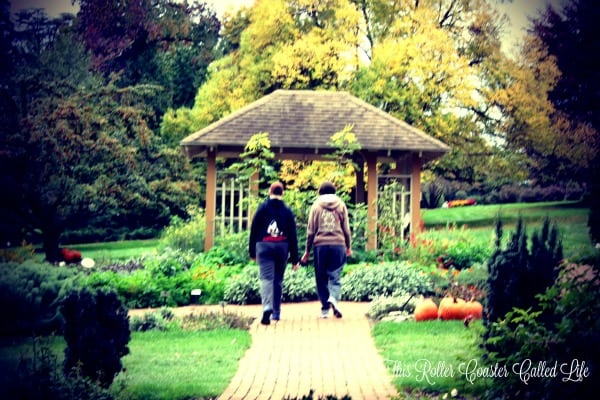
Here is the full photo. I really like how this turned out! I know it is going to take me a little practice and time to work my way up to the “Expert” part, but I’m glad to have found something that allows me to make quick changes without having a lot of working knowledge about photo processing. I know I’ll work up to the “Expert” level at some point.

There are a few new features in this year’s PSE, and one of those is the ability to remove camera shake from photos, like selfies. There is an option to remove haze from photos.
Adobe is all about simplicity and sharing. There are even ways to share to social media directly from PSE. Adobe Photoshop Elements 14 and Premiere Elements 14 is available from Best Buy for $149.99. PSE is for photos, and Premiere Elements 14 is for videos. I haven’t tried to process videos, yet, but I can’t wait to try it to see what it can do! Adobe PSE and Premiere Elements 14 is recommended for casual photo taker who wants an easy way to organize, edit, and share their photos and videos.
Are you ready to take your photos up a notch?
Disclaimer: The reviewer has been compensated in the form of a Best Buy Gift Card and/or received the product/service at a reduced price or for free.
Leave a Reply